apple pie in a jar a.k.a apple butter


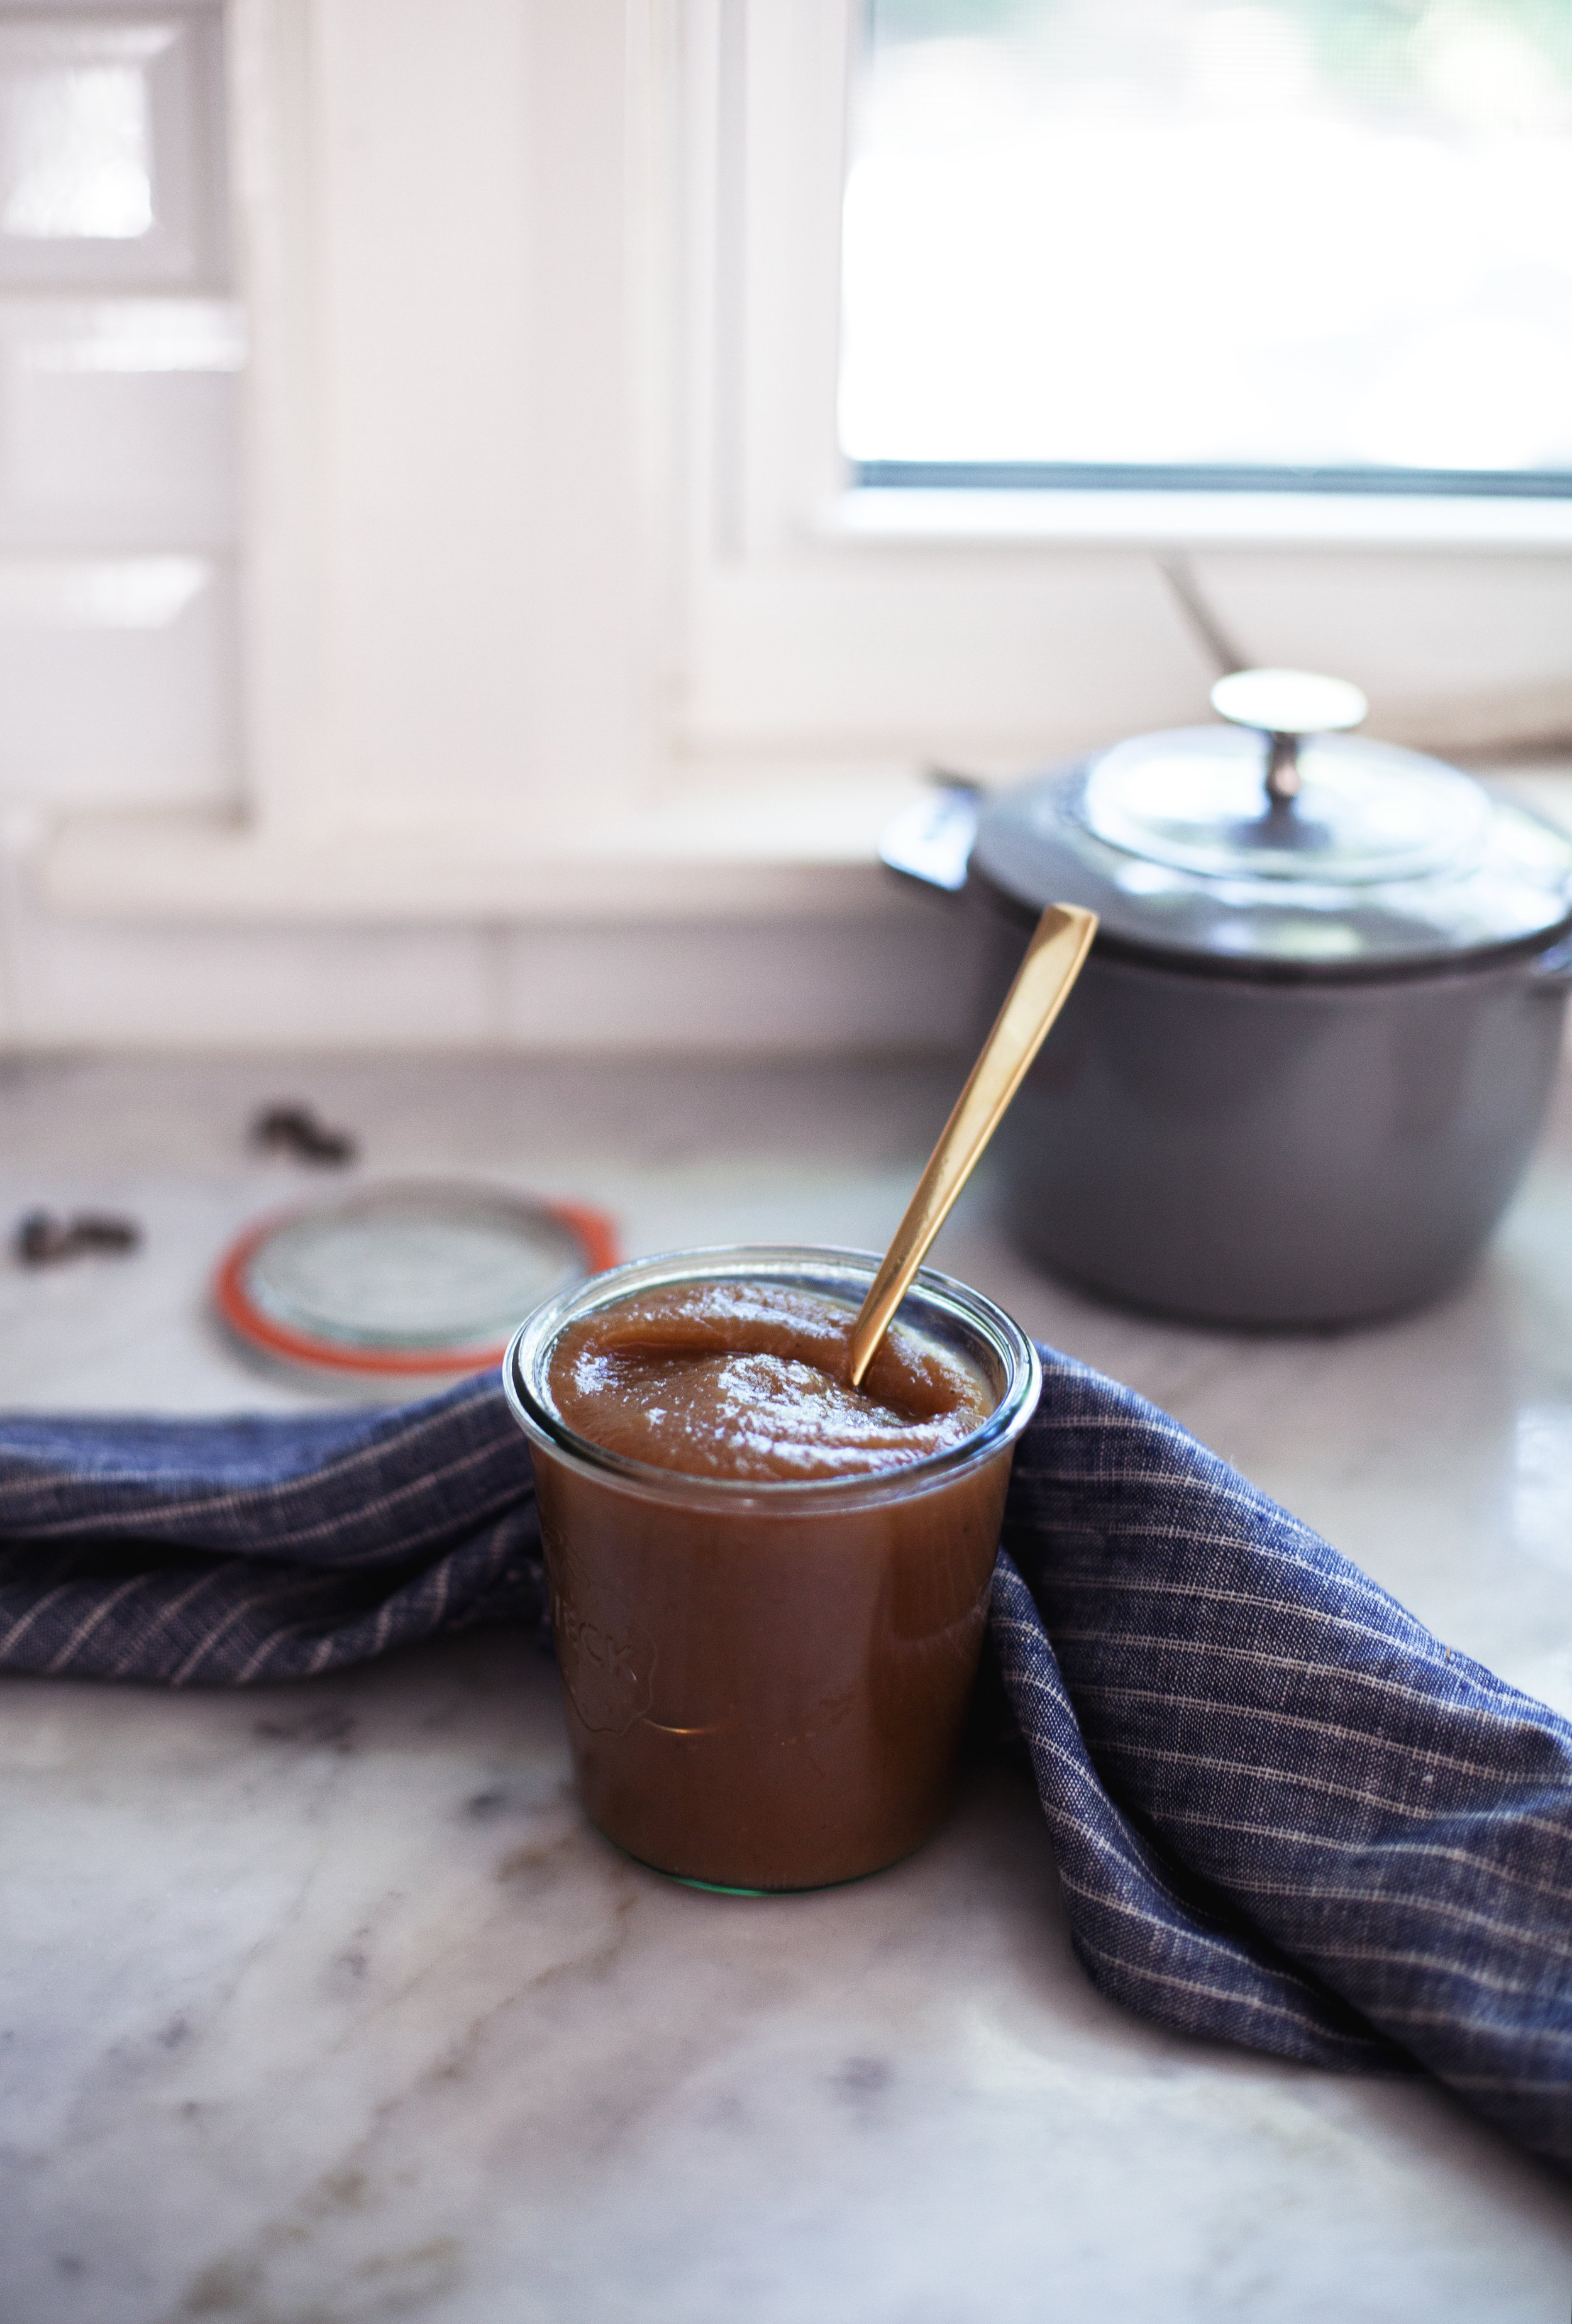
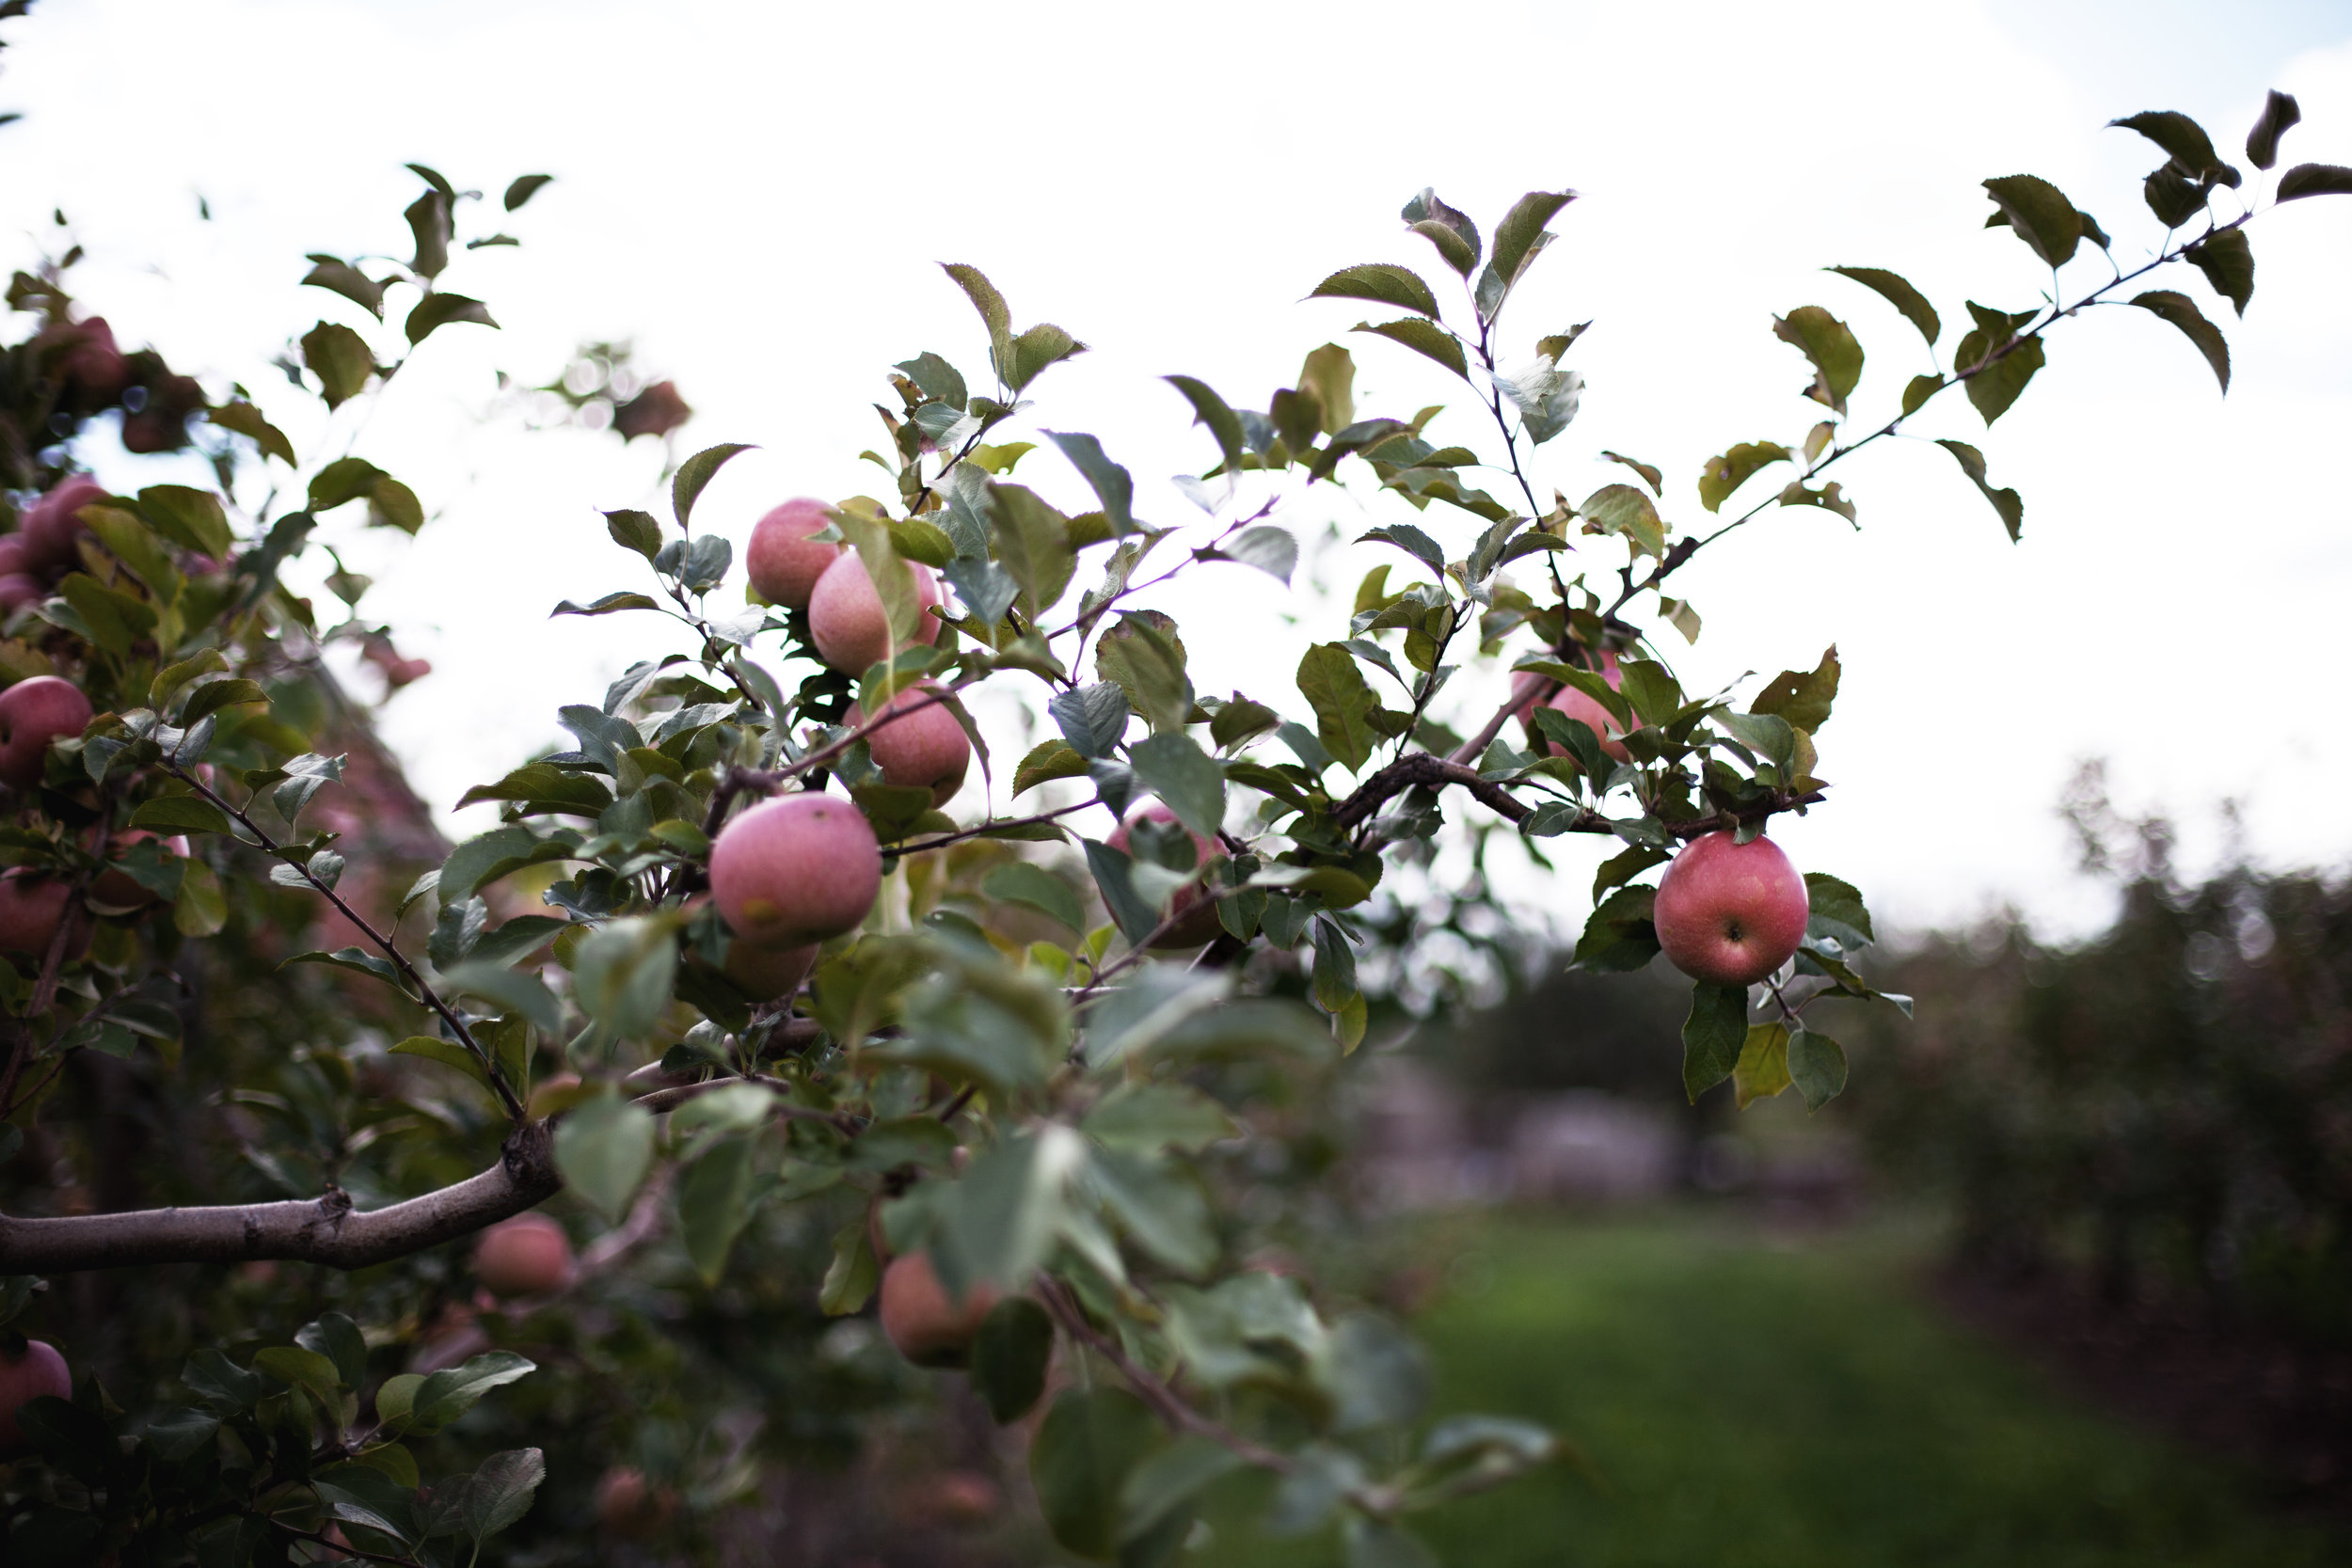
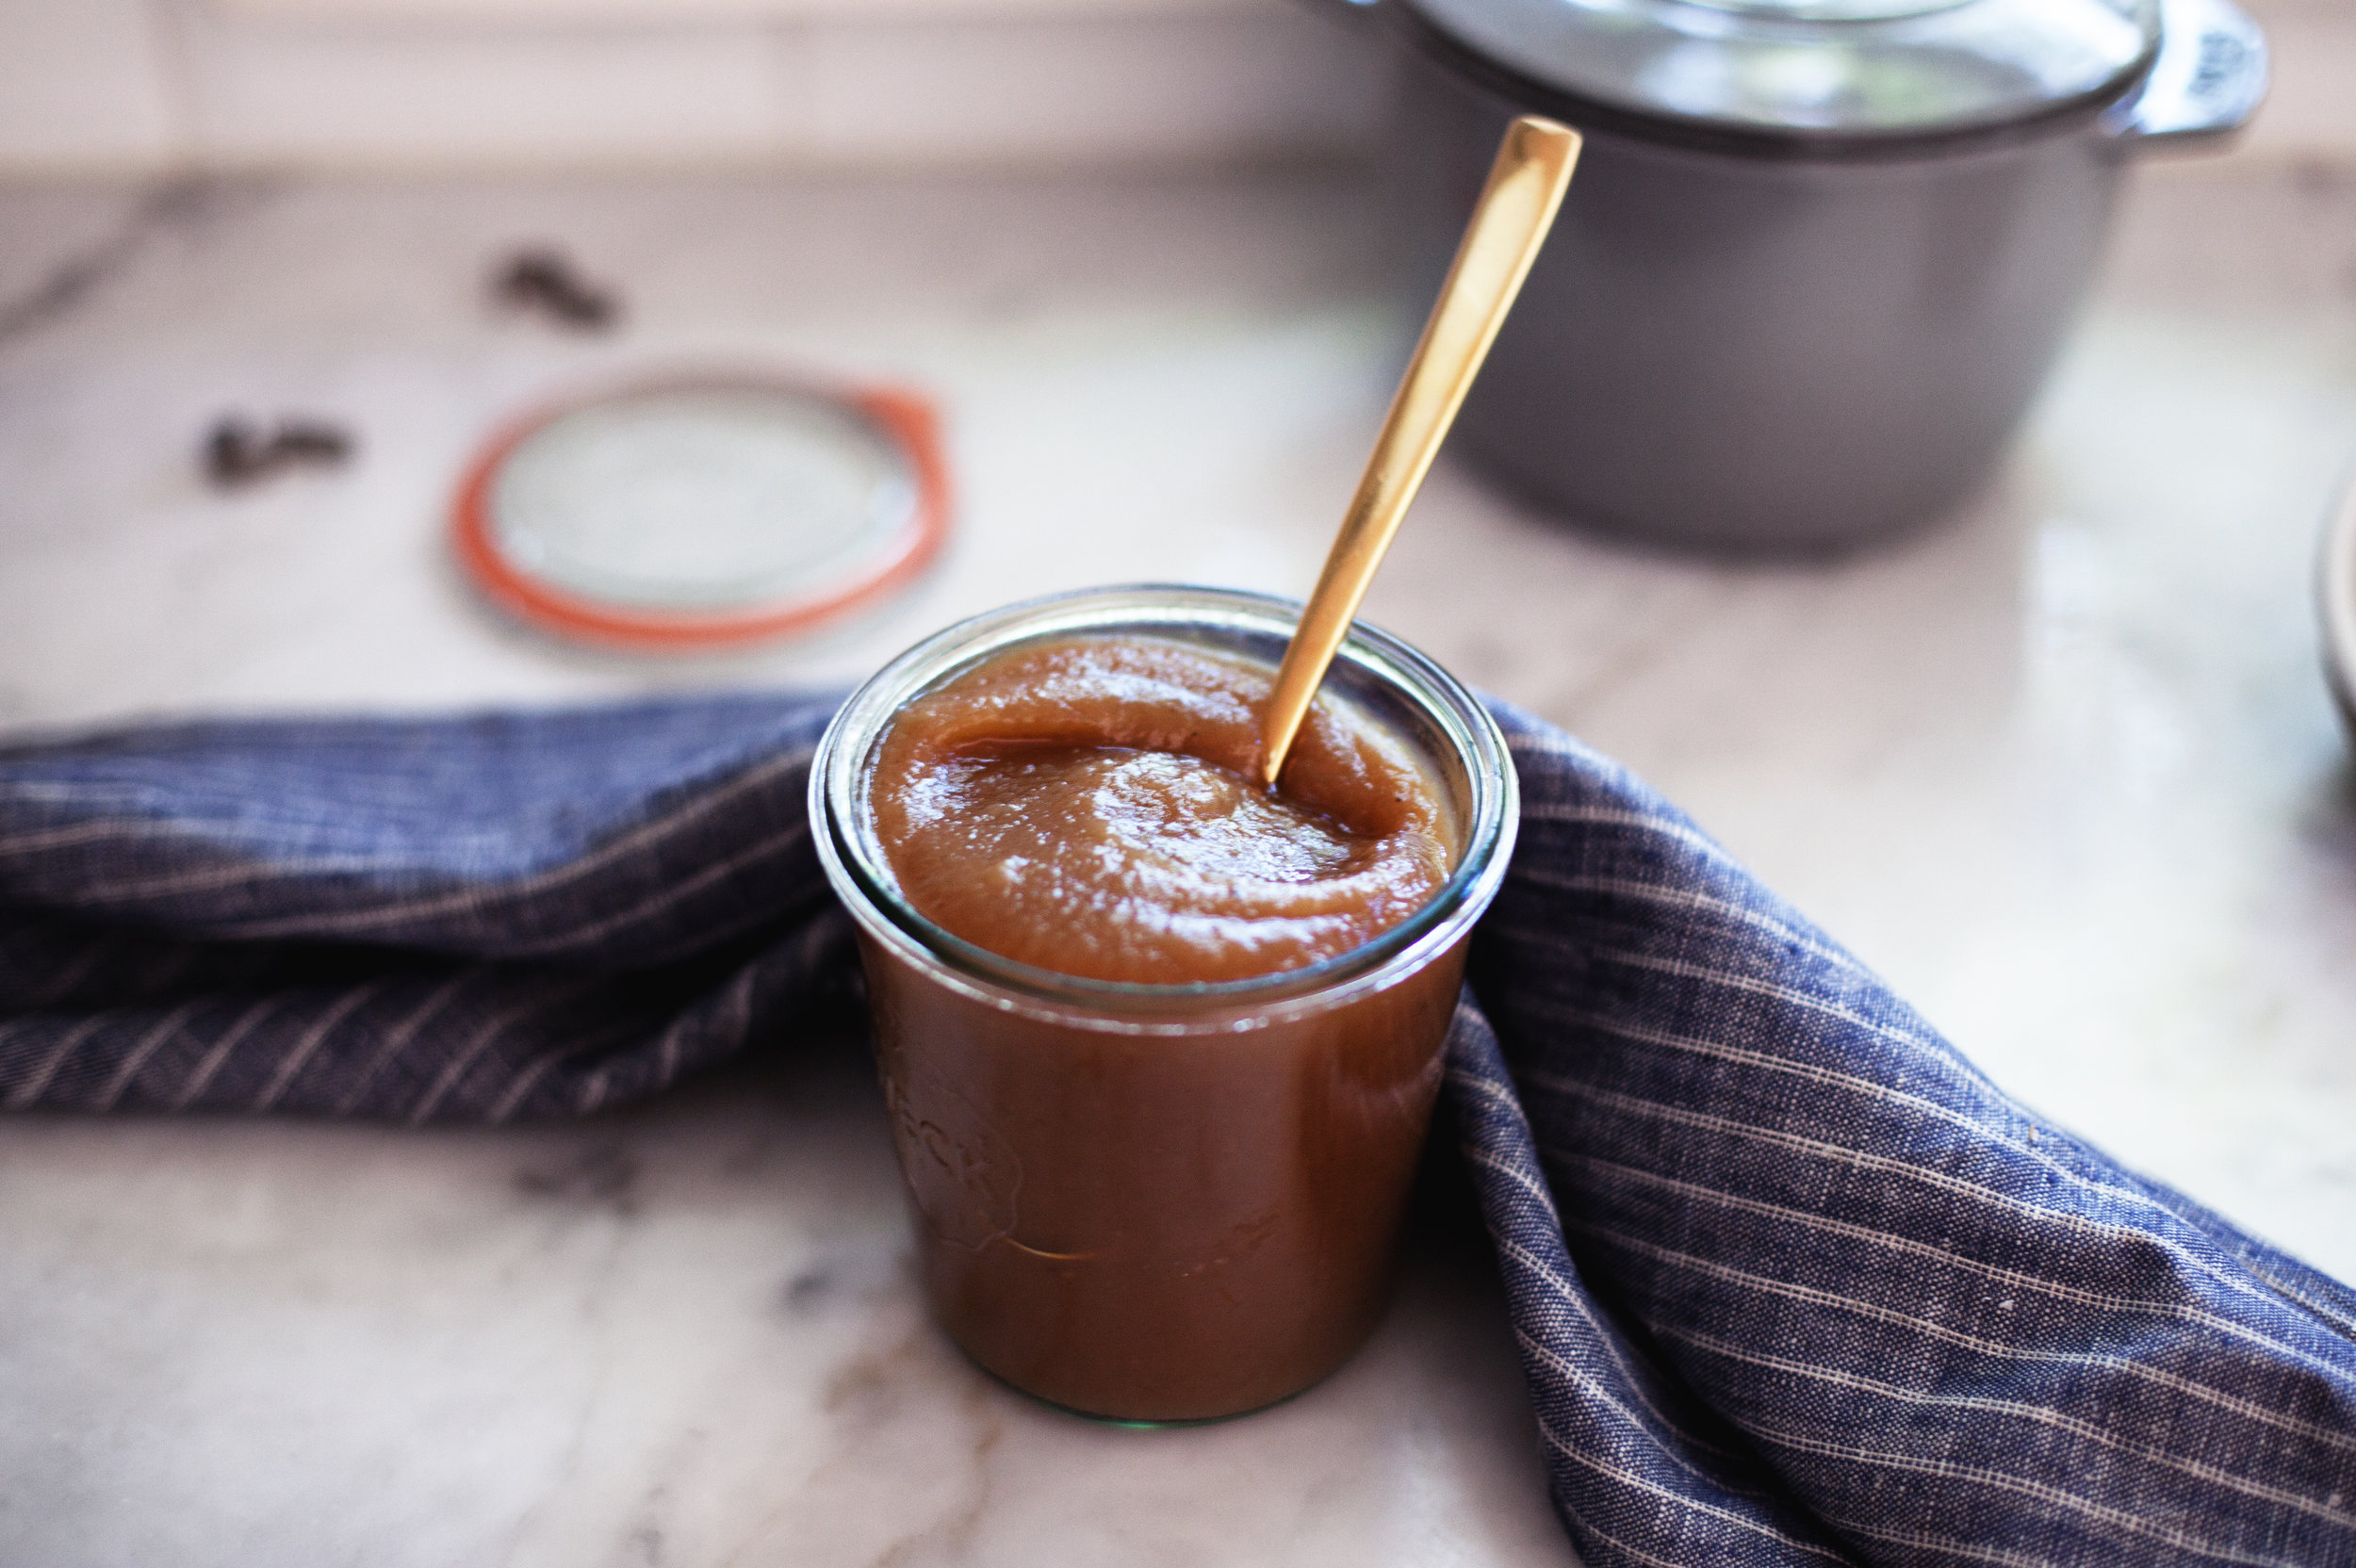
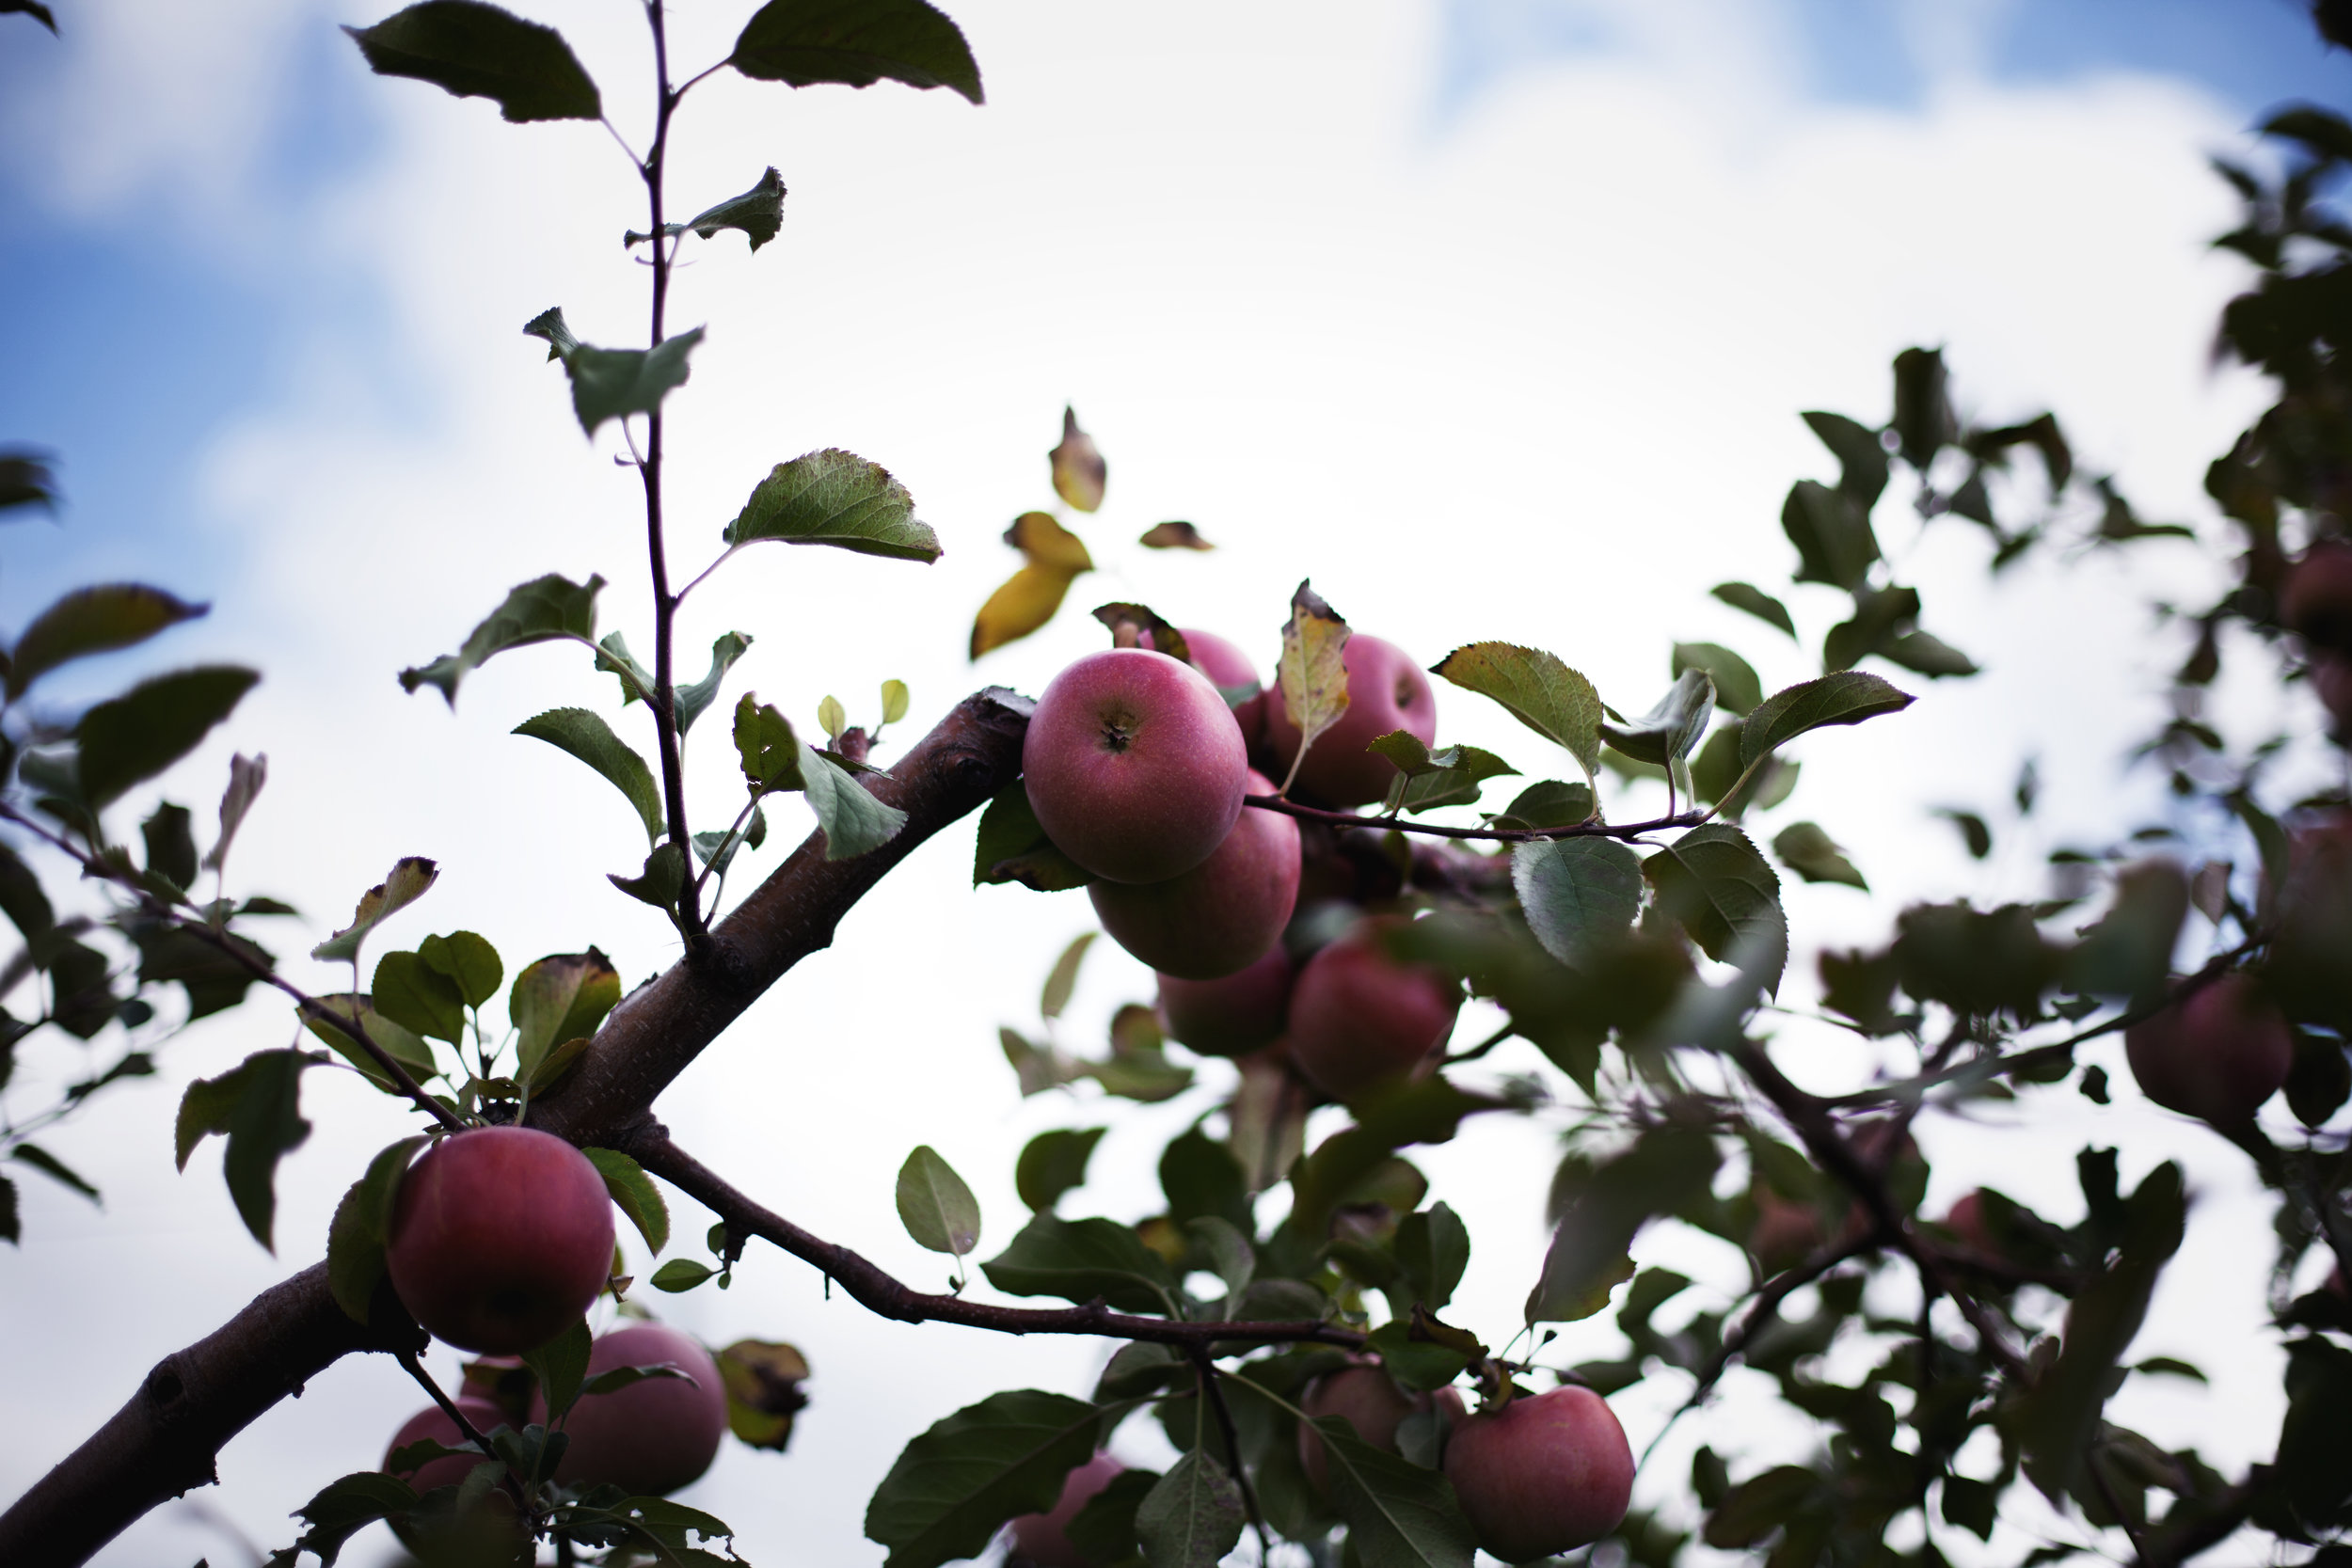
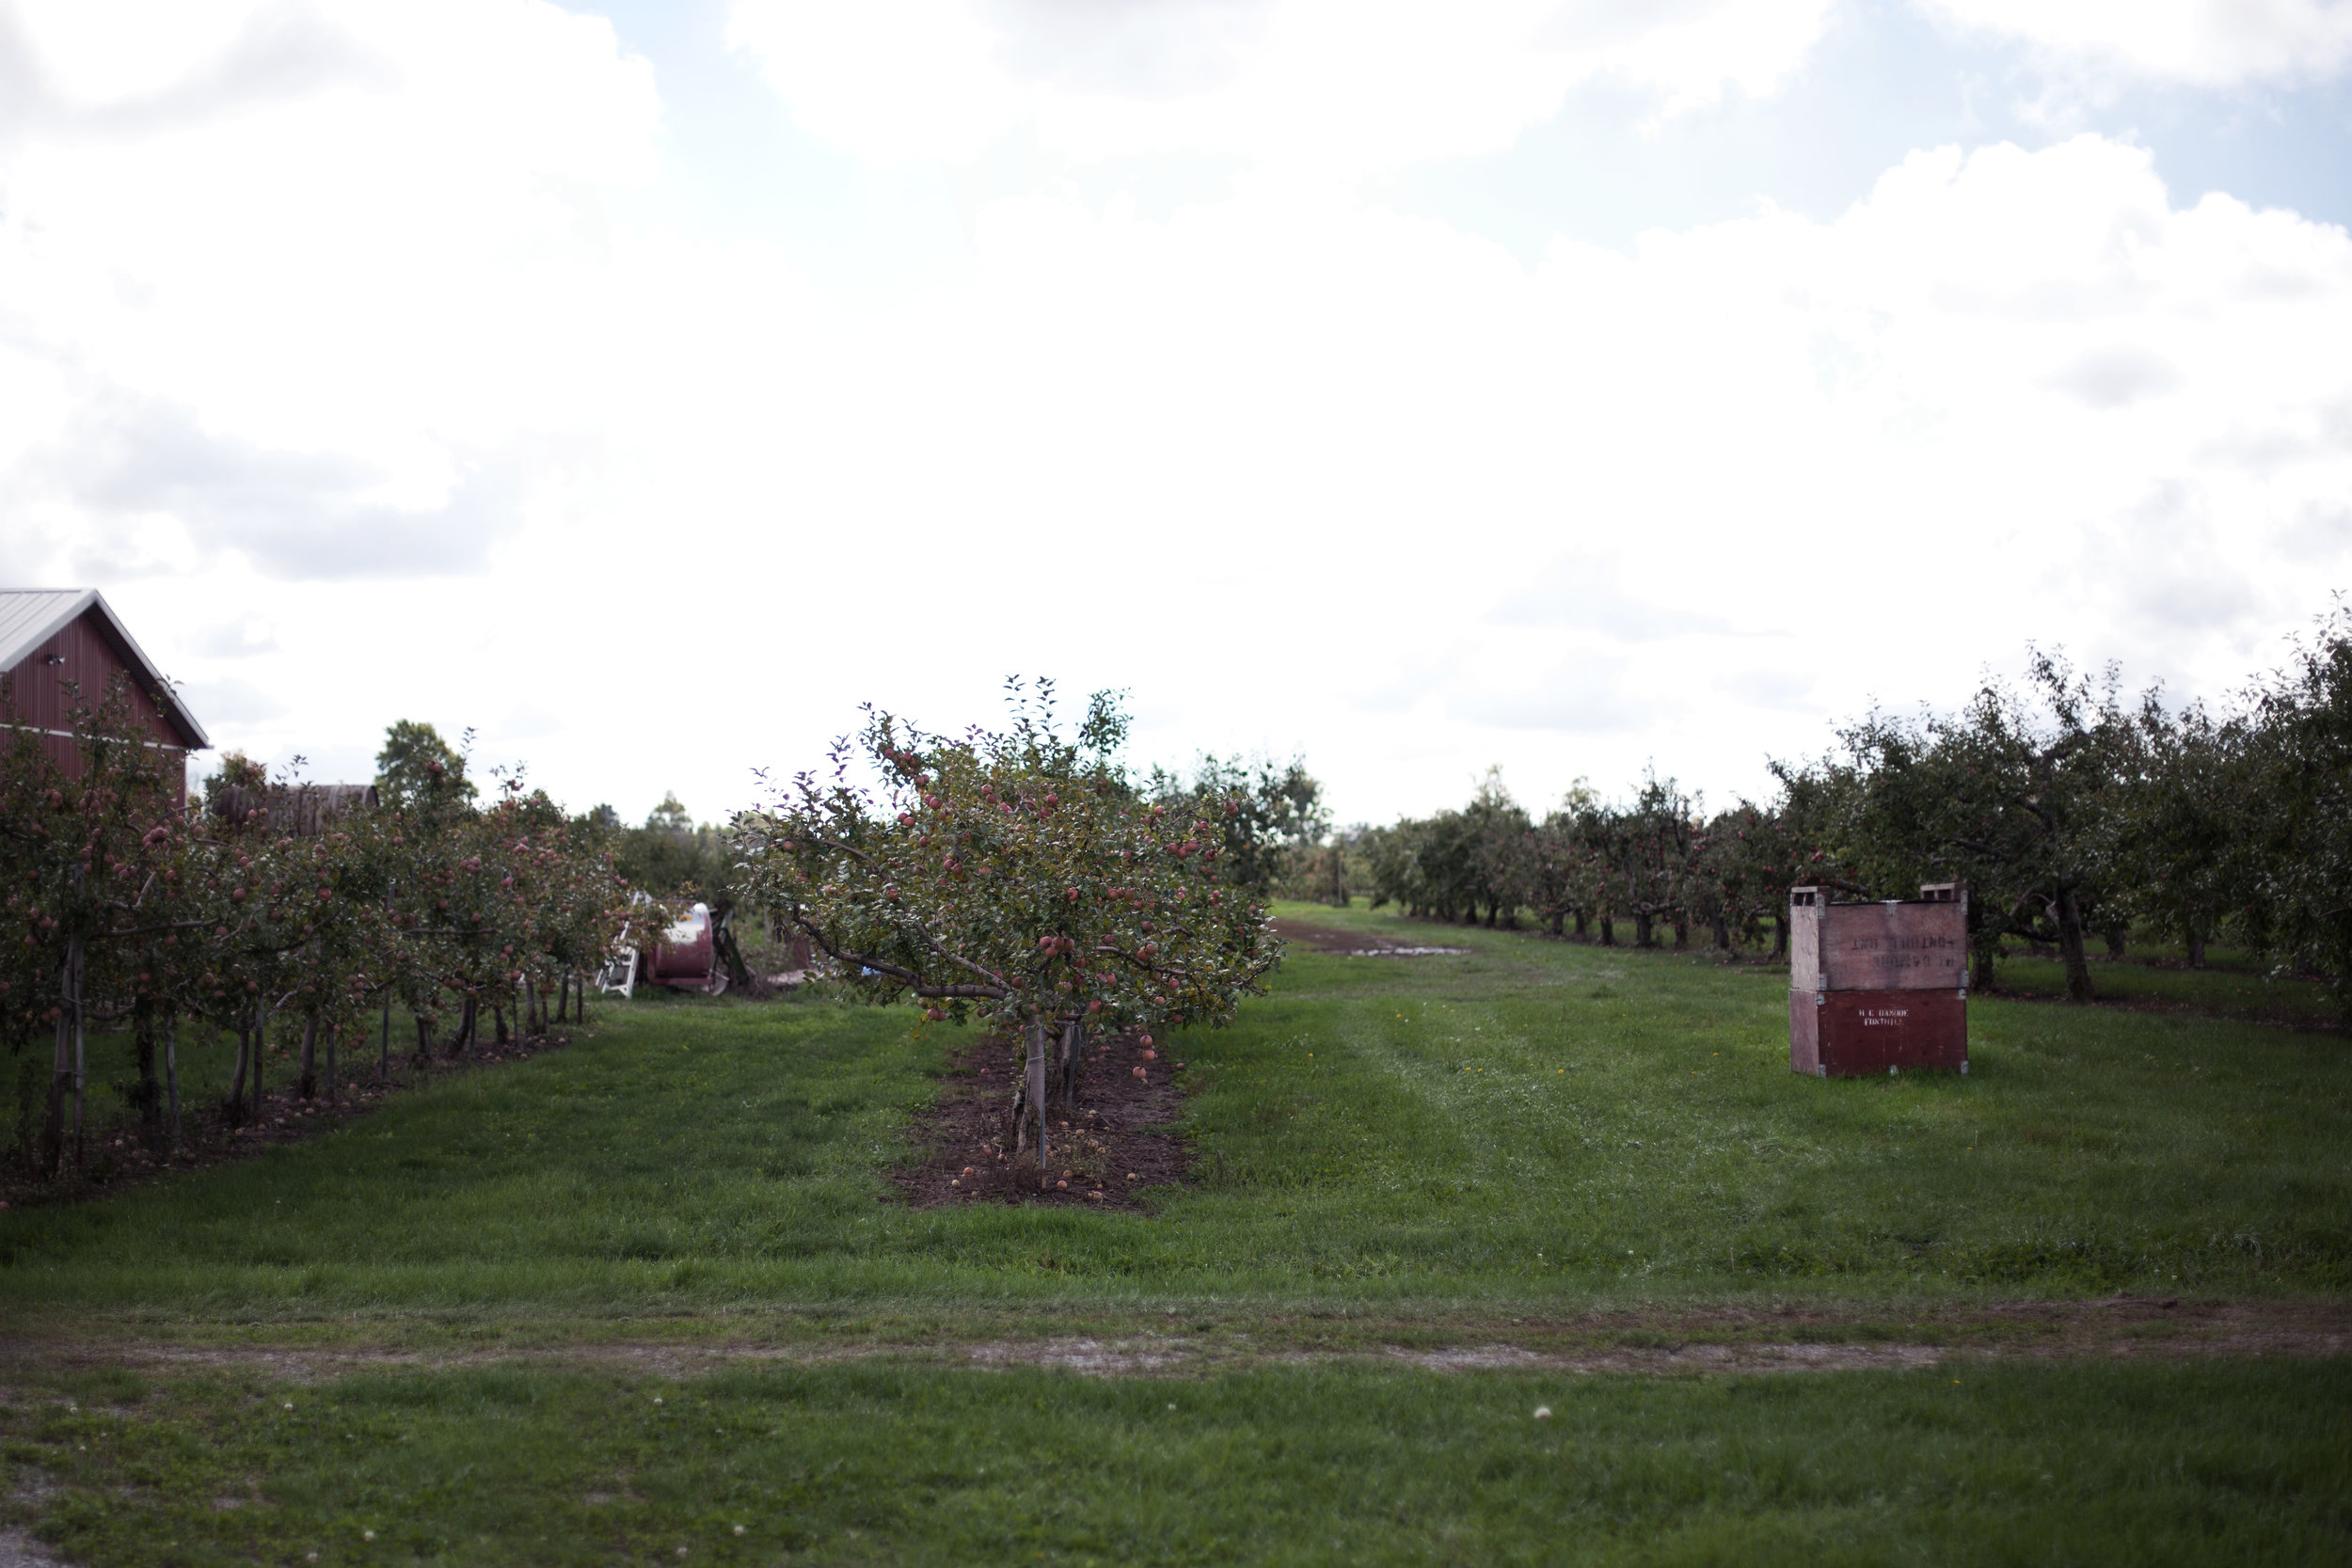
i FINALLY made it to the apple orchards this season! there is the cutest place called the apple bin around the corner from my house & they have acres + acres of apple trees. i got a huge buschel to get through the season (okay, more like the week) of baking with freshly picked apples! they even sell fresh apple cider, so i treated myself to a gallon of that too. wait till you see all the apple recipes i have in store for you! drinks, pies, more pies & this apple butter. it literally taste like apple pie in a jar & you can put it on just about anything. toast, pancakes, waffles or if you are anything like me.. a giant spoon! it is very easy to make, but a bit of a lengthy process so i would even suggest doubleing the recipe & gifting mason jars full of apple butter to friends! next i am off to the pumpkin patch tomorrow to purchase WAY too many pumpkins for the porch. it is an obsession & i can't get over how whimsical the white pumpkins are, they look like they come straight out of cinderella. have a great weekend, i hope you find yourself at an apple orchard or pumpkin patch too.

p.s. look at that shiny knife rack! i have been dying to have my collection of shun knives on display & peg + awl makes the coolest magnetic rack out of reclaimed wood. i just need one more knife for that last spot! i was scared we were going to crack the backsplash installing it, but we bought a stone/granite drill bit & it worked out perfectly!

ingredients

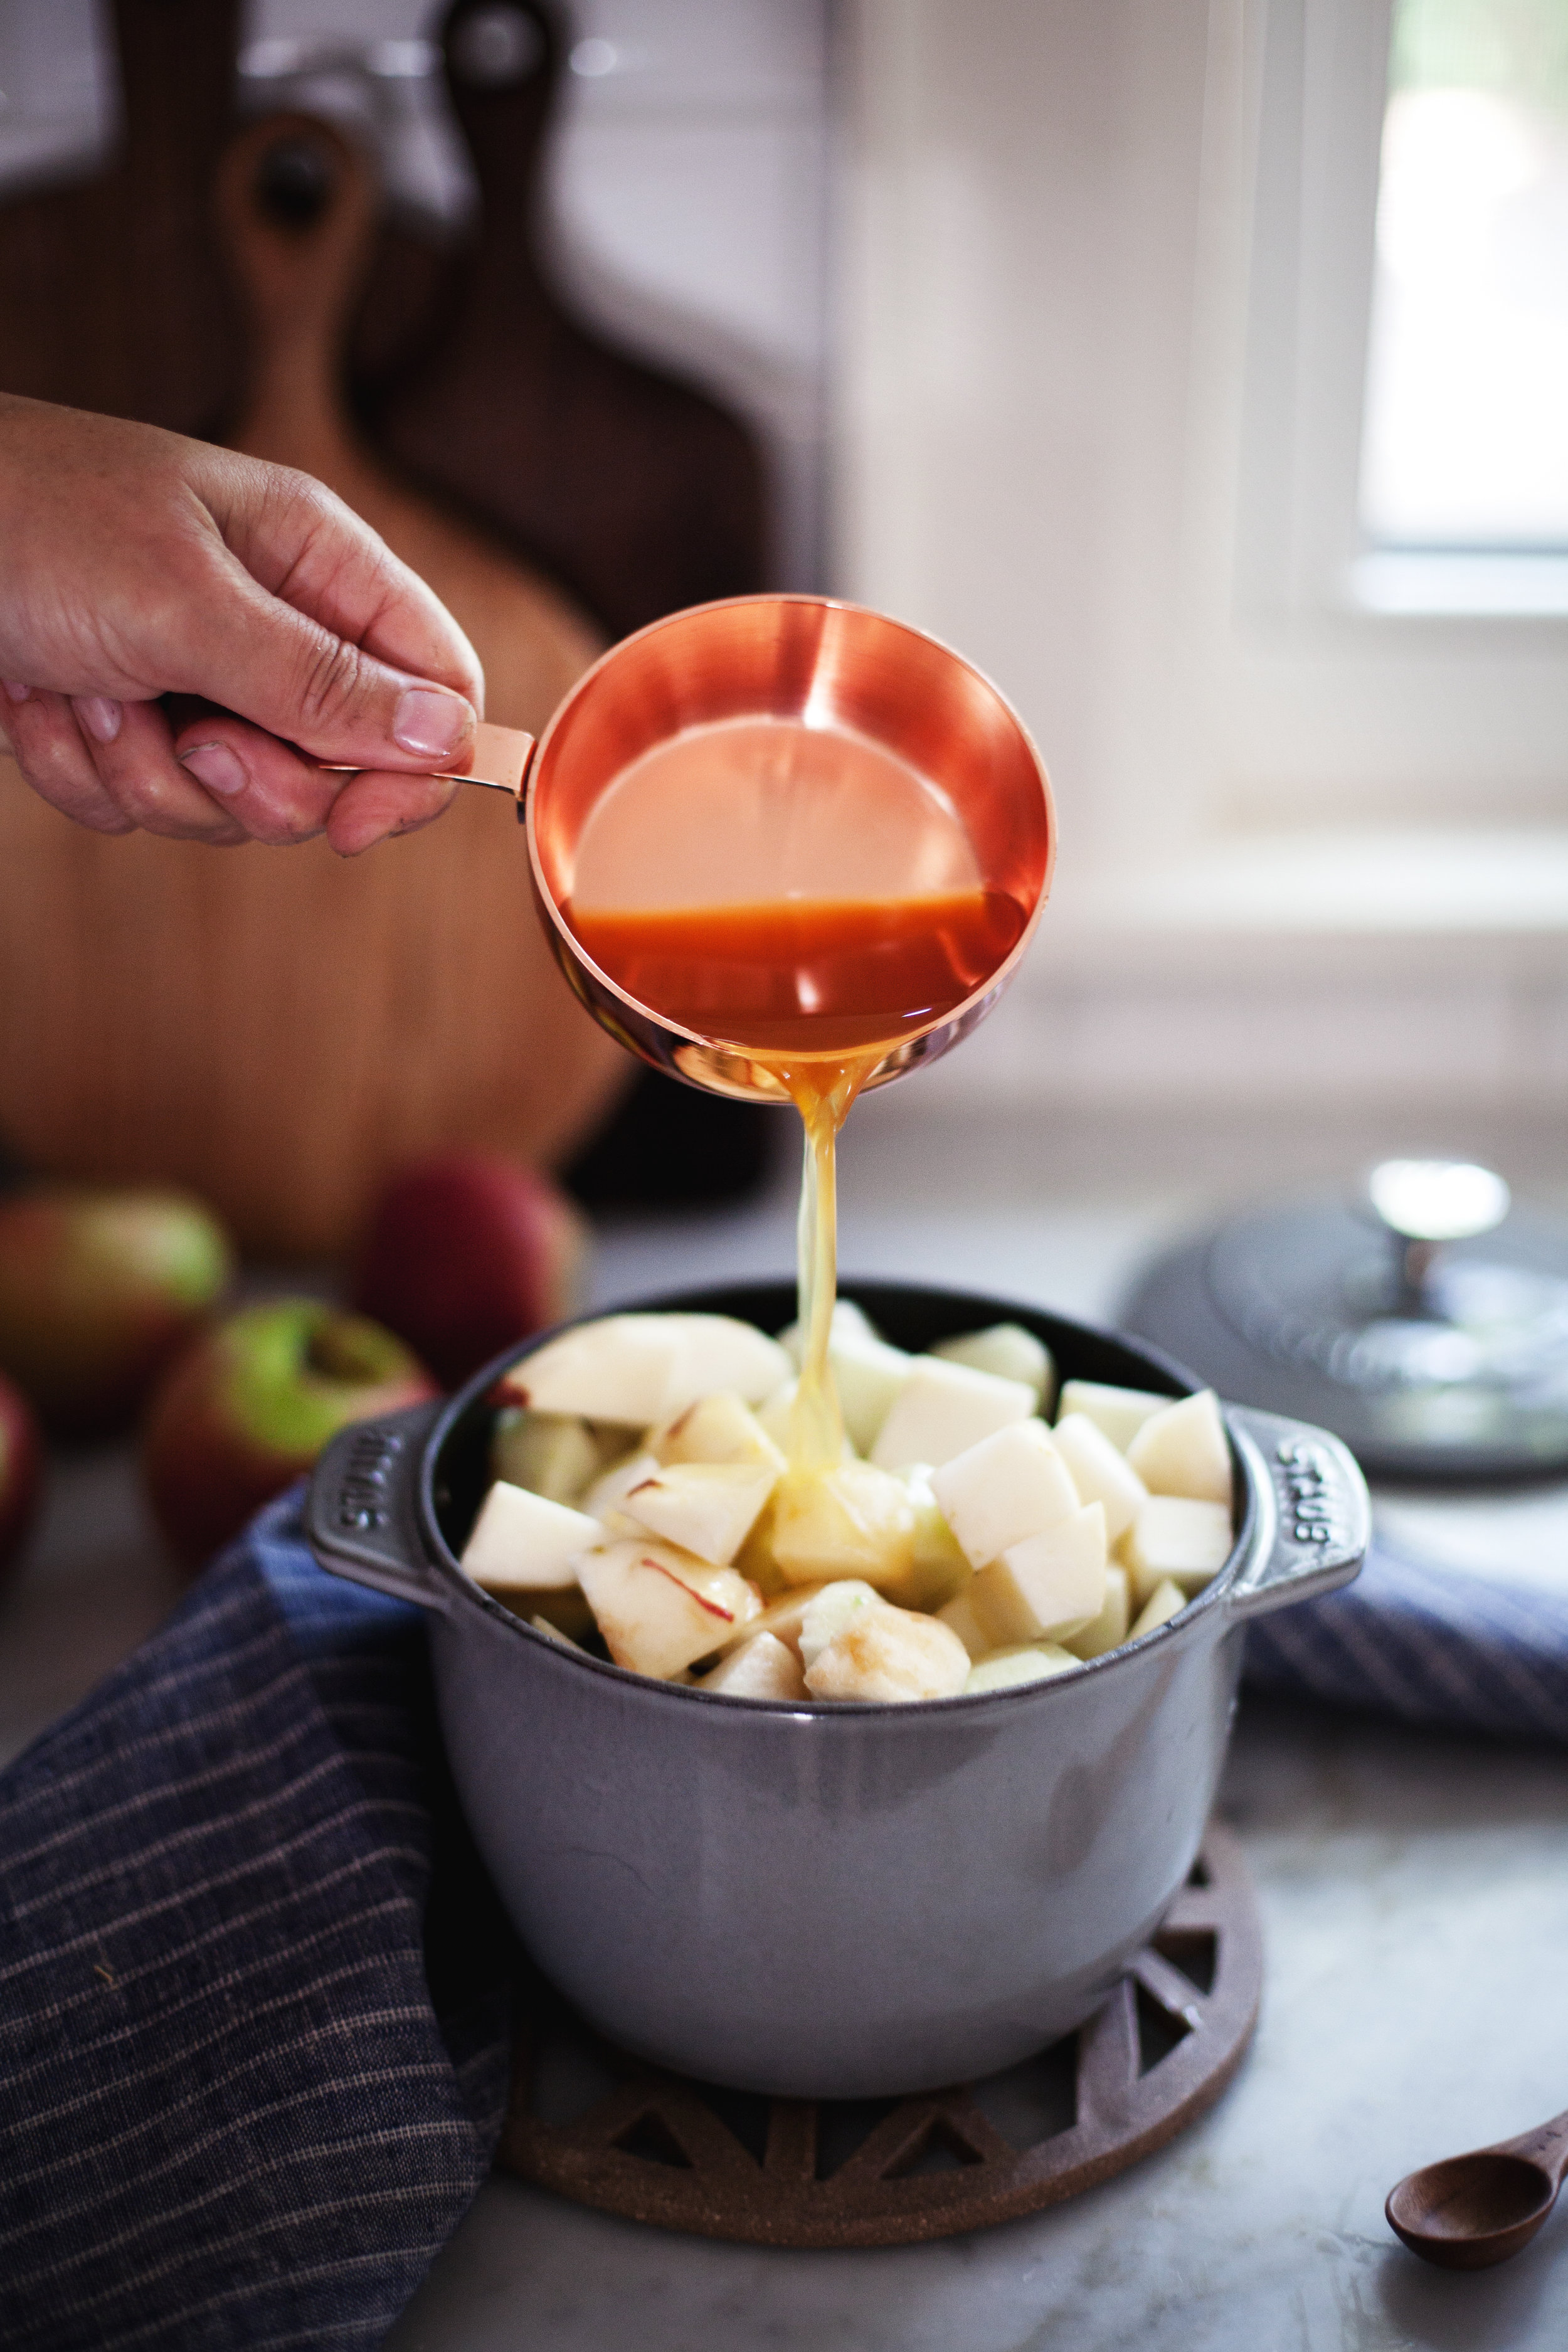
  • 4 pounds apples, peeled & chopped into cubes
  • 2 cups fresh apple cider (no-sugar added)
  • 3/4 cup light brown sugar
  • 1/2 teaspoon sea salt
  • 1 teaspoon ground cinnamon
  • 1/4 teaspoon ground nutmeg
  • 1/4 teaspoon ground cloves
  • 1 teaspoon pure vanilla extract
  • 1 tablespoon fresh lemon juice

directions

  • in a pot add the apples, cider, brown sugar & sea salt. simmer for 20 minutes until the apples have softened.
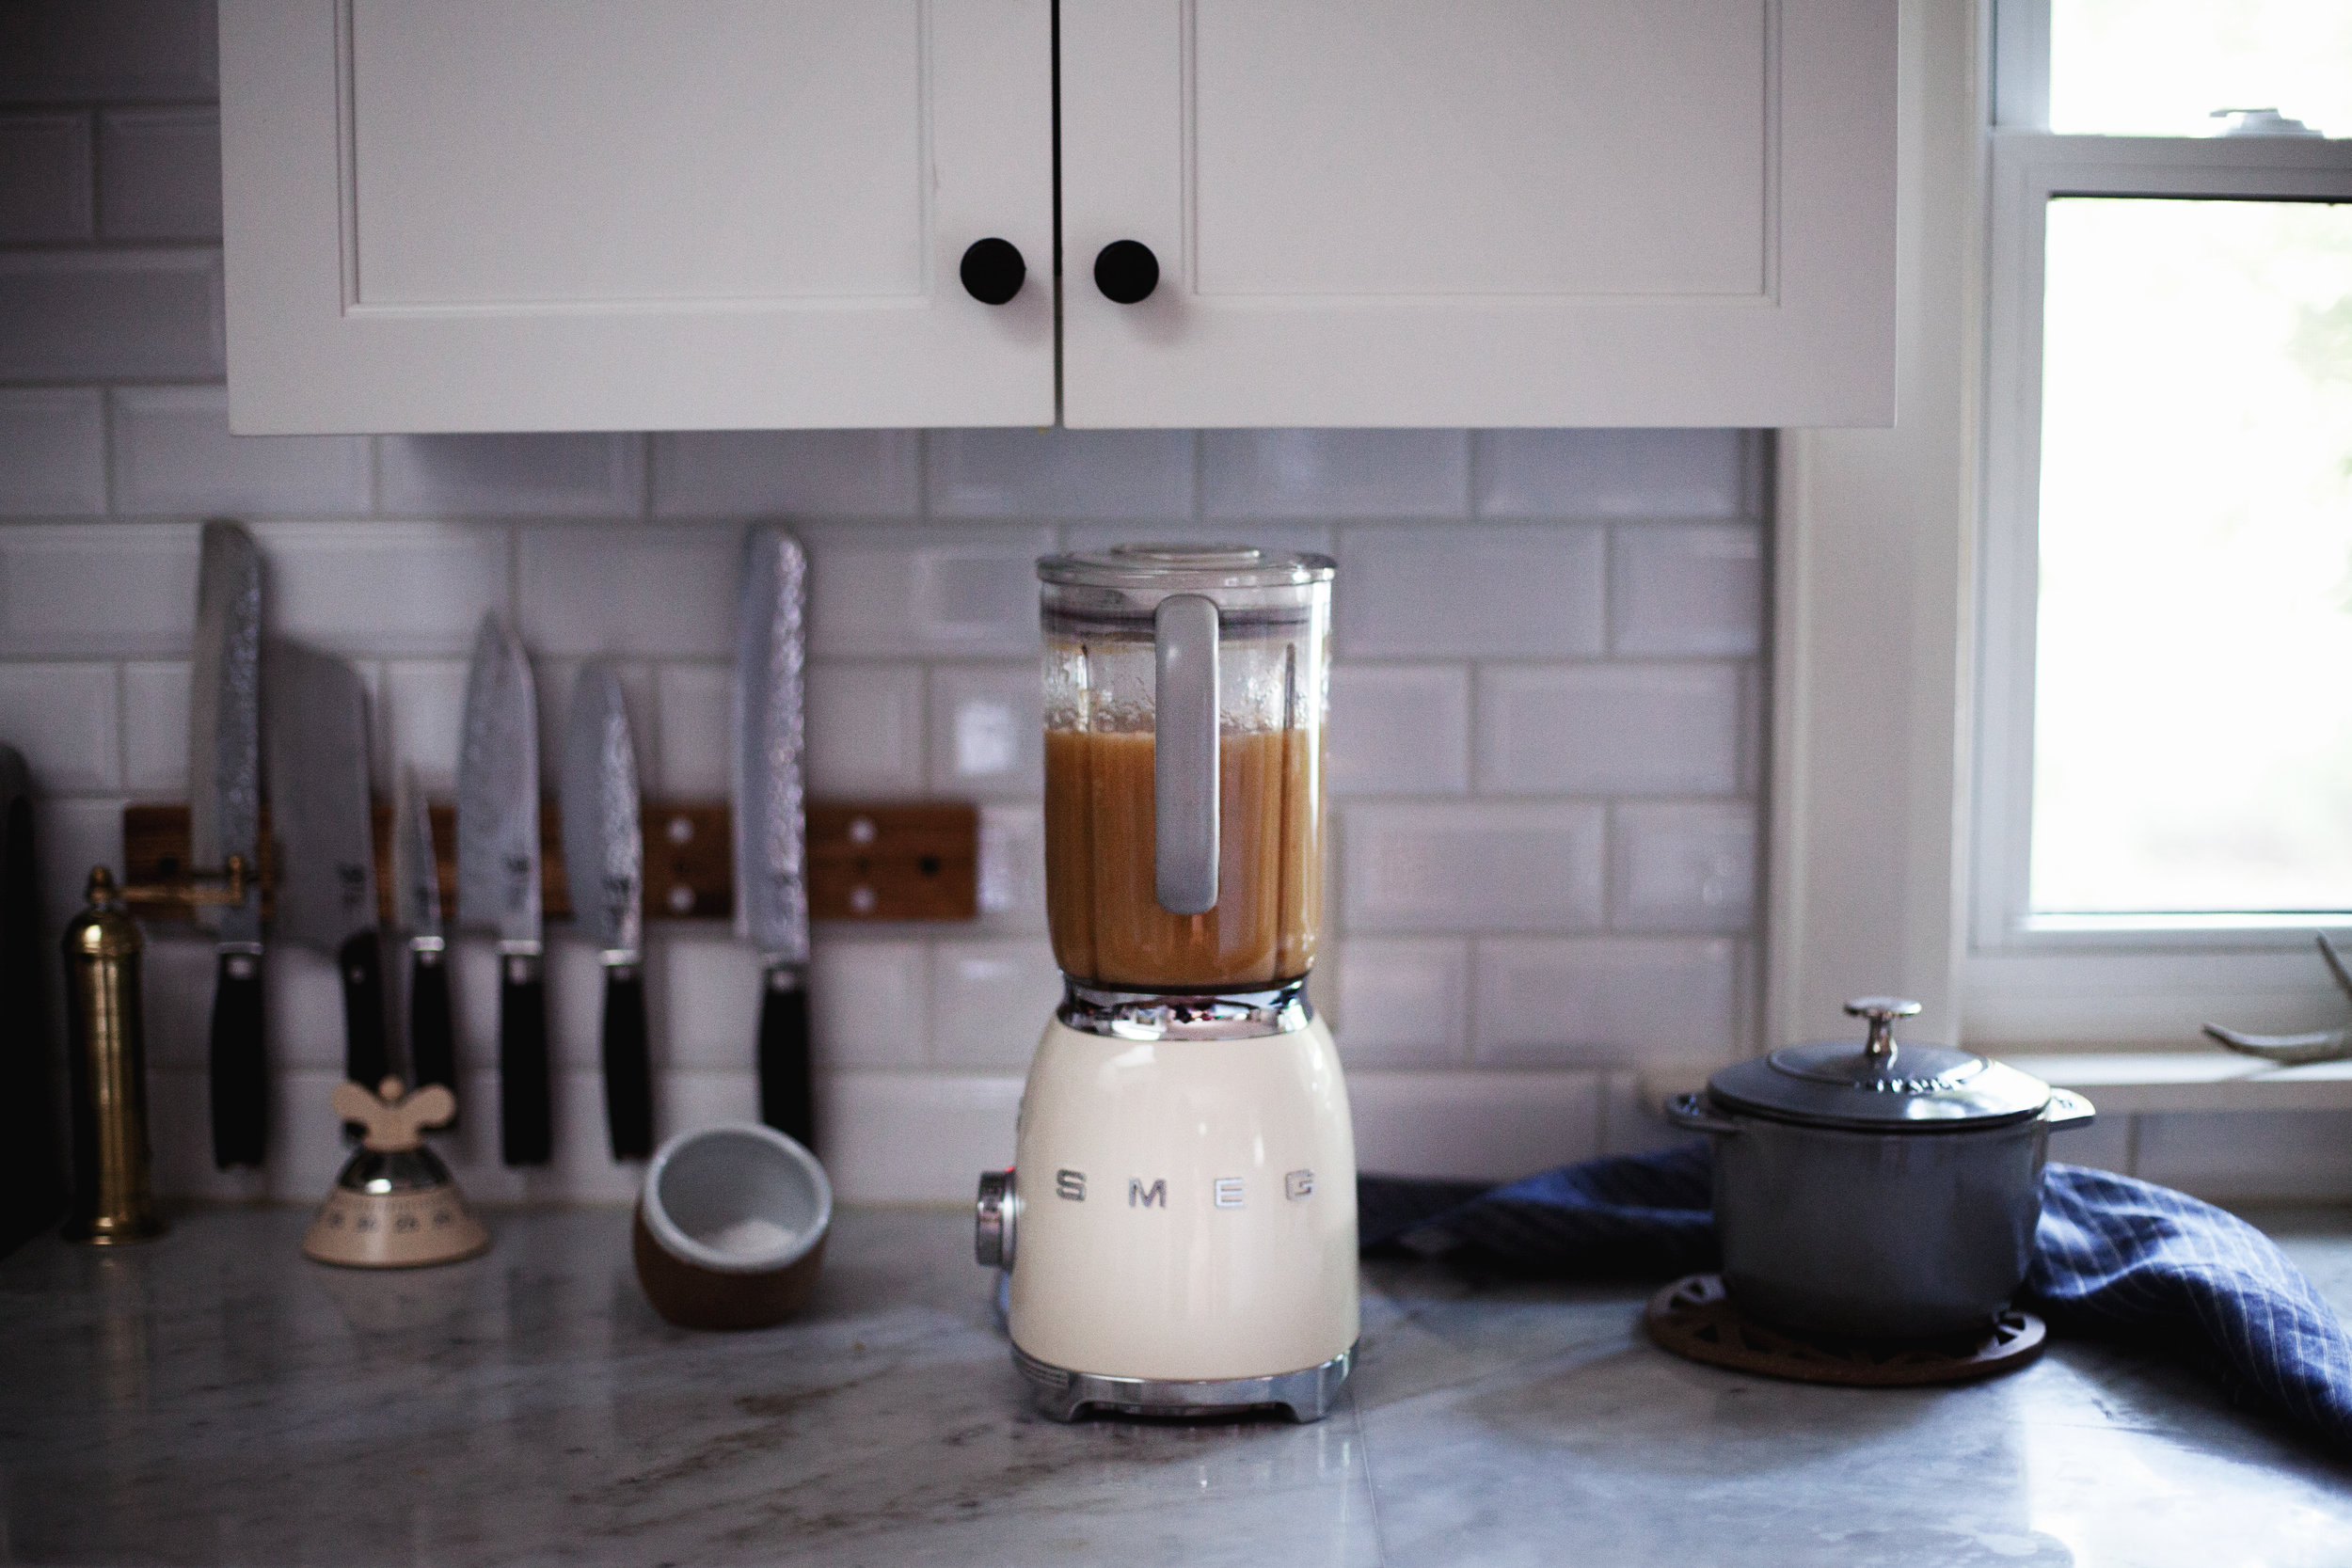
  • pour mixture into a blender & add the cinnamon, nutmeg, cloves, vanilla & lemon juice. puree until smooth.
  • add mixture back to the pot & cook in the oven at 250 degrees for two to three hours. stir every half hour.
  • remove from oven & let cool before placing into weck or mason jars.
  • refrigerate for up to two weeks.

bacon & maple roasted chicken


can you tell what is different about today's photography?! hint: THE KITCHEN. yes! this was my first shoot in my brand new kitchen & what a better way to break it in than creating a chicken recipe from eva kosmas flores' new cookbook adventures in chicken which is released in stores TODAY! she is the amazing author & photographer behind one of my favourite food blogs adventures in cooking. everything she makes is a perfect mix of elegant & rustic. to anyone who knows me personally, they know i am obsessed with chicken. i eat it literally every single day (seriously though, every single day) so i am quite excited to have 150 recipes dedicated to my favourite food.

this roasted bacon & maple chicken stood out to me most because it has all the flavours i love. i wish you could smell how good the kitchen smelled when it was in the oven roasting. they should make a bacon maple rosemary chicken candle scent:) i used this beautiful copper & gold handled roasting pan from mauviel usa which i filled with potatoes tossed in olive oil & garlic. all those sweet drippings from the chicken made for the best flavoured potatoes. i will be sharing the recipe for these maple potatoes on my NOM channel next week too because they were that good! back to painting i go for now... i have two more rooms & the hallway left before the wallpaper gets hung! you will see more of the kitchen very very soon. xo

ingredients

for the maple marinade and chicken

  • 1/4 cup chicken stock
  • 3 tablespoons pure maple syrup
  • 2 tablespoons white vinegar
  • 2 tablespoons kosher salt
  • 1 teaspoon minced fresh thyme leaves
  • 1 whole chicken (about 4 pounds), innards removed

for the roast chicken

  • 2 tablespoons pure maple syrup
  • 2 tablespoons pure maple sugar
  • 1 1/2 teaspoons kosher salt
  • 1 1/2 teapoons dried rosemary
  • 1/2 teaspoon freshly cracked black pepper
  • 4 strips thick cut bacon
  • 1 large sweet onion, diced
  • 1 tablespoon extra virgin olive oil
  • 2 cups chicken stock (more or less depending on roasting pan)
  • 10 large springs of fresh rosemary

directions

for the maple marinade and chicken

  • in a large bowl whisk together the chicken stock, maple syrup, vinegar, salt & thyme.
  • add the whole chicken in a large zip lock bag & coat with marinade.
  • let sit in the fridge for 4 hours or overnight.

for the roast chicken

  • preheat oven to 350 degrees.
  • remove chicken from marinade bag & place in desired roasting pan.
  • in a small bowl mix together the dry rub of maple sugar, 3/4 teaspoon salt, dried rosemary, & black pepper. spread generously over the chicken.
  • in a separate small mixing bowl add the maple syrup, 3/4 teaspoon salt, diced bacon, sweet onion & olive oil. toss over the chicken & into the roasting pan.
  • with the two left over strips of bacon, stuff them under the skin of the breast.
  • place rosemary in the bird cavity & arrange some in the roasting pan.
  • fill the roasting pan two inches high with the chicken stock.
  • tent tightly with foil & bake for 1 hour.
  • remove foil & cook for an additional 15-30 minutes.

for 150 more amazing chicken recipes, check out eva kosmas flores (of the blog adventures in cooking) first cookbook adventures in chicken which is released today! you can order it on amazon here

caramelized brussels sprouts + pancetta


this weekend i am going to be painting just about every room in the new home! i am quite excited to see how all the colours i picked will look. i stuck with warm grey paint tone's from farrow + ball's line of estate emulsion paints! but since getting the home ready will be keeping me quite busy over the next few weeks, i decided to get my thanksgiving menu ready early! so i have teamed up with wayfair to share with you one of my all time favourite thanksgiving side dishes. i mean, pancetta!? it really doesn't get much better then that. i never grew up eating brussles sprouts, so i never had any negative feelings towards these little guys. i actually love them. there is so much you can do with them! cook them in chicken stock, toss them in browned butter or go the sweet route & use apple cider. this is such a quick & easy one pot side dish to put together which is very important when preparing a whole thanksgiving feast! the less dishes to wash in the end, the better.

you can find some fun thanksgiving decor, tablescape ideas & serving bowls, up on wayfair!, i even got a few items for the house too. okay, a few is an understatement.. i am starting to become best friends with the UPS guys. anyways, wish me ALL the luck with painting! i am sure going to need it once i finish one wall & see there is three more to go.

ingredients

  • 2 pounds brussels sprouts, trimmed & halved
  • 1 tablespoon extra virgin olive oil
  • 1/4 pound pancetta, diced
  • 2 cloves of garlic, sliced
  • 2 medium shallots, sliced
  • 2 teaspoons quality balsamic vinegar
  • sea salt & cracked black pepper, to taste

directions

  • in a large pot of salted boiling water, add brussels sprouts. blanch them for two minutes & immediately submerge them into an ice bath. this will keep those sprouts bright & vibrant throughout the rest of the cooking process. set aside.
  • in a sauce pan over medium heat add the olive oil & pancetta. cook until the pancetta is browned & crispy. remove pancetta but leave the fat to cook with.
  • add the garlic & shallot, cook until translucent. about 5 minutes.
  • toss in the blanched brussels sprouts with the balsamic vinegar, salt & pepper. cook until tender, about 10 minutes.
  • add the pancetta back in & pour into desired serving dish.

this post was created in partnership with wayfair.ca for the pass the dish campaign! you can see the rest of the menu here: appetizer | main | side dish | dessert